Use Asset Catalogs for a View’s Background Image in Xamarin.iOS
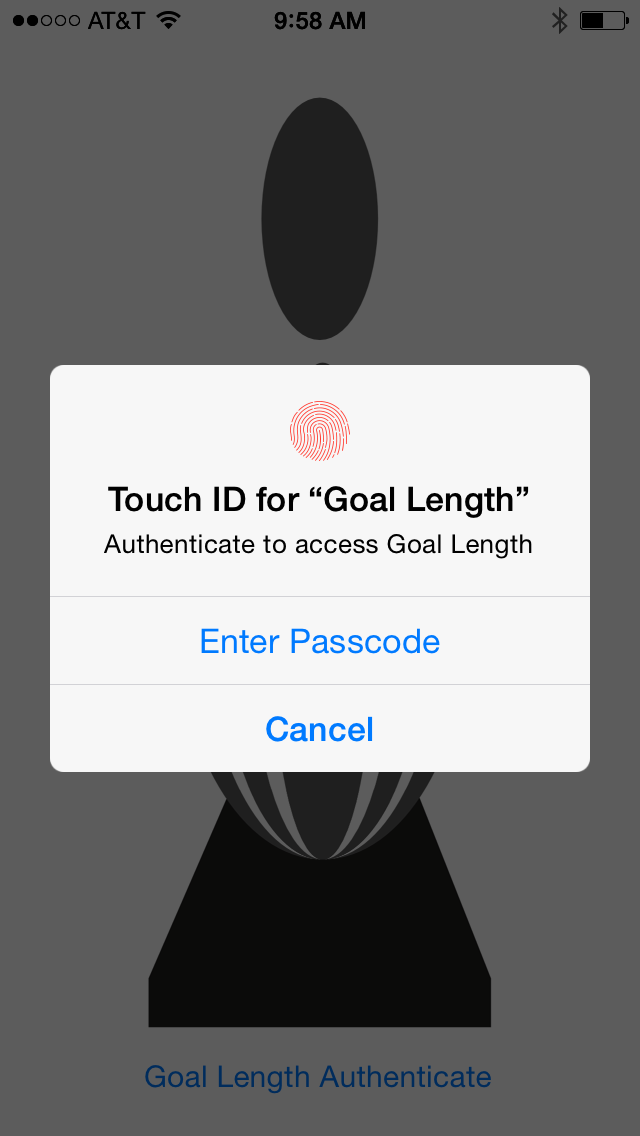
18 Nov 2014In my latest app Goal Length, I added the ability for the user to enable Touch ID / Passcode protection to launching the application. A user cannot open the application unless they authenticate via Touch ID or using their device’s Passcode.
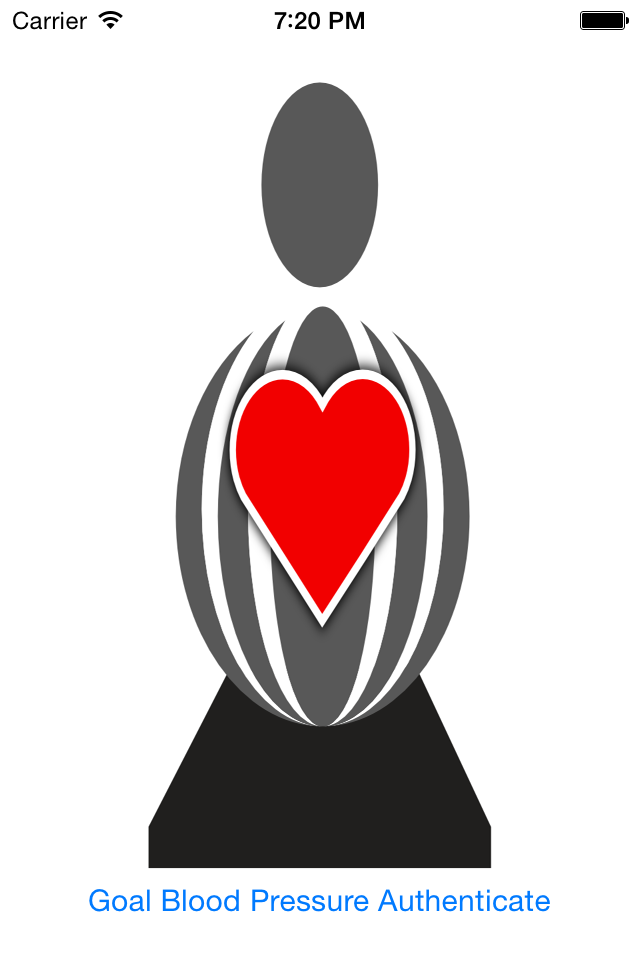
For a smooth user experience while authenticating I wanted the application launch image to be displayed behind the Touch ID / Passcode dialog. From the user’s perspective the application would launch, my launch image would be shown while the application is launching, the application would finish launching, I’d load the launch image as the background of my authentication View, and then the Touch ID / Passcode dialog box would pop up asking the user authenticate.
In this article I’ll cover how to successfully use Asset Catalogs for launch images and loading the proper background image for a given device. This will allow you to transition from a launch image to your first View while retaining the launch image in the background. Be advised, this technique works well most of the time, it fails when devices have the same resolution, but different physical dimensions, like the iPhone 5s and iPhone 6.
Resources
-
https://github.com/benhysell/G.BackgroundImages - Example source code, complete with launch images.
-
Authentication in Xamarin.iOS with Touch ID or Passcode - How to enable Touch ID / Passcode authentication in a Xamarin.iOS application.
-
Apple iOS Human Interface Guidelines Icon and Image Sizes - Listing of required image sizes for launch images.
-
Asset Catalogs in Xamarin Studio - About half way down the page, review on how to use Asset Catalogs.
Why Asset Catalogs
Simply, asset catalogs make our lives easier. For this project I’ll be loading a different image based on the resolution of the device. Without an Asset Catalog I have to maintain a semi-complex if/else structure checking the device height for each of our possible devices. Before discovering Asset Catalogs my code looked something like this:
UIImage backgroundImage = null;

if (UIScreen.MainScreen.Bounds.Height == 480)
	backgroundImage = UIImage.FromFile (@"Icons/[email protected]");
else if (UIScreen.MainScreen.Bounds.Height == 568)
	backgroundImage = UIImage.FromFile (@"Icons/[email protected]");
else if (UIScreen.MainScreen.Bounds.Height == 667)
	backgroundImage = UIImage.FromFile (@"Icons/[email protected]");
else if (UIScreen.MainScreen.Bounds.Height == 736)
	backgroundImage = UIImage.FromFile (@"Icons/[email protected]");
else
//etc for each iPad resolution

View.BackgroundColor = UIColor.FromPatternImage(backgroundImage);
Note
In addition, and I’m not sure if this is a Xamarin bug or not, the files for each one of the devices needs to be named in the [email protected] format for each of the different resolutions. I had originally named the files their actual resolution names, i.e. [email protected] was named 640x970.png, but the scaling of the image in the background was completely wrong.
Even though we could solve our problem this way, we can do better.
Changing your Application to use Asset Catalogs
I’ll be working in Xamarin Studio for this article, as of this writing and Xamarin.iOS release this cannot be done in Visual Studio.
In Xamarin Studio first ensure your application is setup to use Asset Catalogs by right clicking on your project, select Options, from the Project Options select Build/iOS Application and scroll down to Universal Icons and Universal Launch Images and ensure Source is set properly for each.
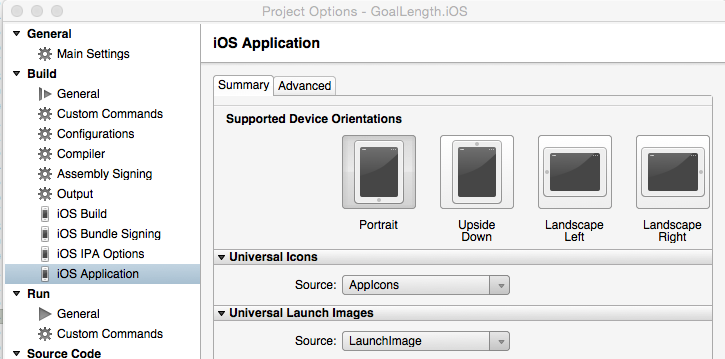
This will create a Resources folder in your application along with AppIcons.appiconset and LaunchImage.launchimage folders. Instead of adding your app icons and launch images in the project options we’ll now add them via the Resources/LaunchImage.launchimage/Contents.json file. Double click on Resources/LaunchImage.launchimage/Contents.jsonand let’s set our launch images.
Setting our Launch Images
First we are presented with a bunch of empty slots with resolution requirements for each device, and the iOS version the resolution corresponds to.
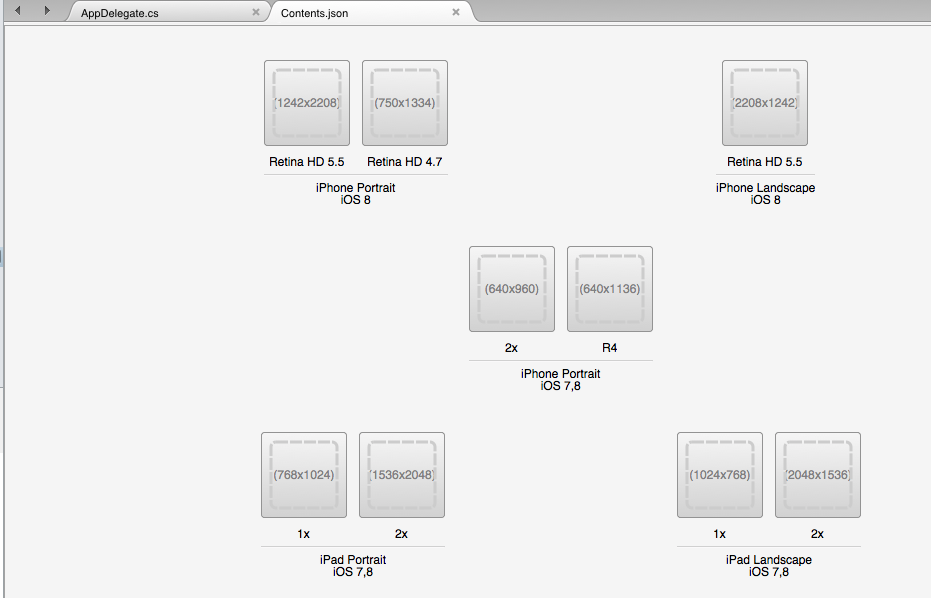
In this example application I plan to support the following devices in portrait mode:
- iPhone 4s
- iPhone 5 / 5s
- iPhone 6
- iPhone 6 Plus
- iPad 2 / iPad Mini
- iPad Retina (iPad 3, iPad4, iPad Air, iPad Air 2)
So I’ll need to fill in each of the launch images for each of the devices.
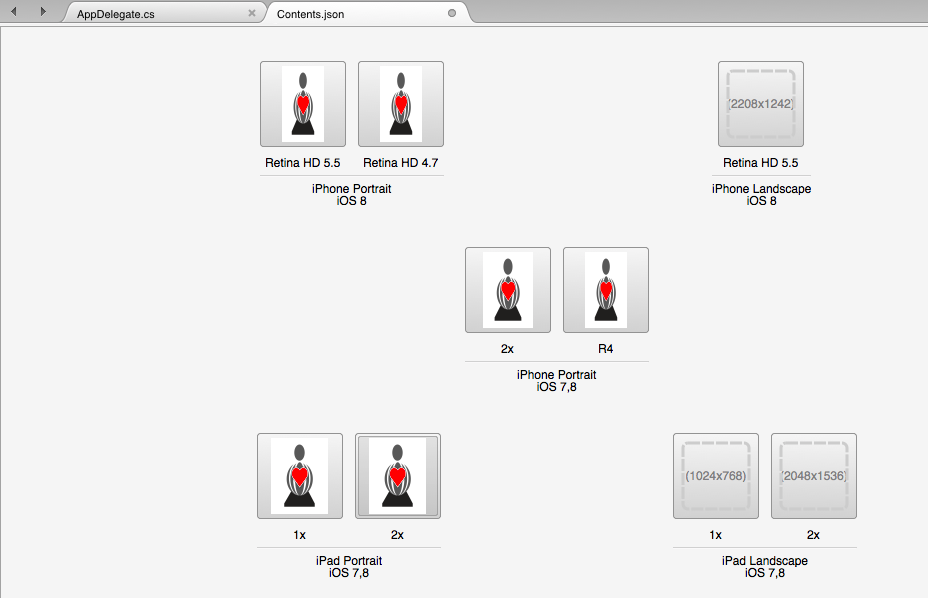
If we run our application we now have a launch image for each one of the devices.
Adding a Background Images Asset Catalog
Let’s now add our Background Images Asset Catalog. I can hear you saying, “Why not just use the Launch Image Asset Catalog as the source of our background images?” Believe me, I tried going down this path. Stay with me, you’ll see shortly why this does not work.
Right click on Resources/Images.xcassets and select Add/New Image Set.

Rename the image set to BackgroundImages.imageset and double click on the Contents.json file. We’ll do the same procedure we did for the Launch Images asset catalog and fill in the following:
- 2x iPhone
- 3x iPhone
- 1x iPad
- 2x iPad

We leave the R4 image empty, this would be the image that is set for the iPhone 5s / iPhone 6, it is shared by the iPhone 5s / iPhone 6.
As best as I can tell, since the overall resolutions for the iPhone 5s and iPhone 6 are identical, they are viewed as the same in the eyes of the Asset Catalog, if the user has an iPhone 5 or iPhone 6 the Asset Catalog will display the image in the R4 slot. This might be fine for most applications, but for us we are supplying an image that takes up the entirety of the screen, and we need two different images. Hence the Asset Catalog we just created cannot be leveraged by the iPhone 5s / iPhone 6 in this instance.
One would think the Launch Image Asset Catalog would take care of this problem for us, alas, no matter what I tried I could not make the Launch Image Asset Catalog select the proper image when running on the iPhone 5s or the iPhone 6.
Using Background Images Asset Catalog
Once we have everything configured in our project using the Background Images Asset Catalog using them in code is fairly straight forward. We’ll account for the fact we cannot load the proper images for the iPhone 5s / iPhone 6 from the Asset Catalog by checking the device’s Height. If the Height matches the iPhone 5s / iPhone 6 we’ll use a UIImage.FromFile call to load the proper image.
UIImage backgroundImage = null;
if (UIScreen.MainScreen.Bounds.Height == 568)
	backgroundImage = UIImage.FromFile(@"Icons/[email protected]");
else if (UIScreen.MainScreen.Bounds.Height == 667)
	backgroundImage = UIImage.FromFile(@"Icons/[email protected]");
else
	backgroundImage = UIImage.FromBundle("BackgroundImage");
View.BackgroundColor = UIColor.FromPatternImage(backgroundImage);
Remember, the iPhone 5s and iPhone 6 files need to be named [email protected] and [email protected] respectively, else they will not load properly.
Once implemented our user will launch the application, see the launch image from the Launch Image Asset Catalog, and then be shown the image from the Background Image Asset Catalog. Had I also implemented Authentication in Xamarin.iOS with Touch ID or Passcode, I could automatically present the user with the Touch ID / Passcode dialog box, thus creating a seamless transition into our application.
In the demo app you’ll know you are looking at the image from the Background Image Asset Catalog because I added an authentication button at the bottom of the screen.
Summary
Asset Catalogs are nice additions to iOS development for managing and loading images in code. The only exception is when one needs a different image for devices that are physically different heights but have the same resolution, like the iPhone 5s / iPhone 6, we still need to manage loading those images by hand.
Working example source code can be found at https://github.com/benhysell/G.BackgroundImages, and my published application using these techniques can be found on the app store.