Authentication in Xamarin.iOS with Touch ID or Passcode
13 Nov 2014Adding Touch ID to your application is easy to do in iOS 8, in most cases this can be done in less than 20 lines of code. In this scenario the developer is responsible to supply a backup mechanism for the user if they choose not to use Touch ID for authentication. This type of Touch ID authentication is done using Local Authentication without Keychain Services.
Apple provides users the ability to use a Passcode to unlock their phone if they do not configure Touch ID, or choose not to use it, if say, all of their fingers are covered in jelly and they know their fingers will not successfully work with Touch ID, users can enter a Passcode to access their device.
What if we could use that same Passcode to protect our applications? With a few lines of code we can leverage Touch ID and use the user’s Passcode as a backup authentication mechanism.
Source Code
https://github.com/benhysell/V.TouchIdExample
Resources
Introduction to Touch ID / Using the Local Authentication Framework in your App
Xamarin provides an excellent introduction to Touch ID, Keychain Services, and Local Authentication on iOS. If you are new to the topic start here to familiarize yourself your options.
Adding Touch ID Authentication in iOS 8
Alex Blount provides the crib notes for adding Touch ID to your app via Local Authentication. From his example he shows how simple it is to get up and going, but this example lacks a backup mechanism if the user decides not to use Touch ID.
How to Use Apple‘s Touch ID Fingerprint API in Your Mobile App
Excellent article in obj-c on using Keychain Services, Touch ID, and the device’s Passcode as backup to Touch ID, and is the basis of my approach in this article.
Xamarin provides the insight on how to work with Apple’s Keychain Services which we’ll leverage to launch Touch ID / Passcode authentication.
Motivation
In my latest application, Goal Length, I designed an application that provides users an easy method to record different body measurements on a daily basis. Measure your neck, chest, waist, ect, record them, and see from day to day, week to week, if you are physically shrinking or growing, the tape measure doesn’t lie. The scale can report you are putting weight on, but you could be loosing inches on your waist. Without body measurements you might think your not progressing towards your goals.
Information like this isn’t something someone typically wants easily accessible. Hand your unprotected phone to your friend and they can be navigating through your last several body measurements, which could prove embarrassing.
Most Touch ID implementations besides the Apple Home Screen Lock, are meant for the user to supply a user name and password to protect a service, say a log in to a website. Hence, typical implementations of Touch ID protection rely on the developer to provide the backup mechanism for the user to enter their password specific to that service.
Since I’m just looking to protect the application from prying eyes, and I don’t have a application specific login/password I wanted to use the user’s already configured Touch ID / Passcode. Why make someone memorize one more password?
Implementation
Note
The demo code for Touch ID / Passcode supplied in this article will not run properly on the simulators. Since you cannot set a Passcode on the simulators you’ll need to run and test your code on a real device to see it work.
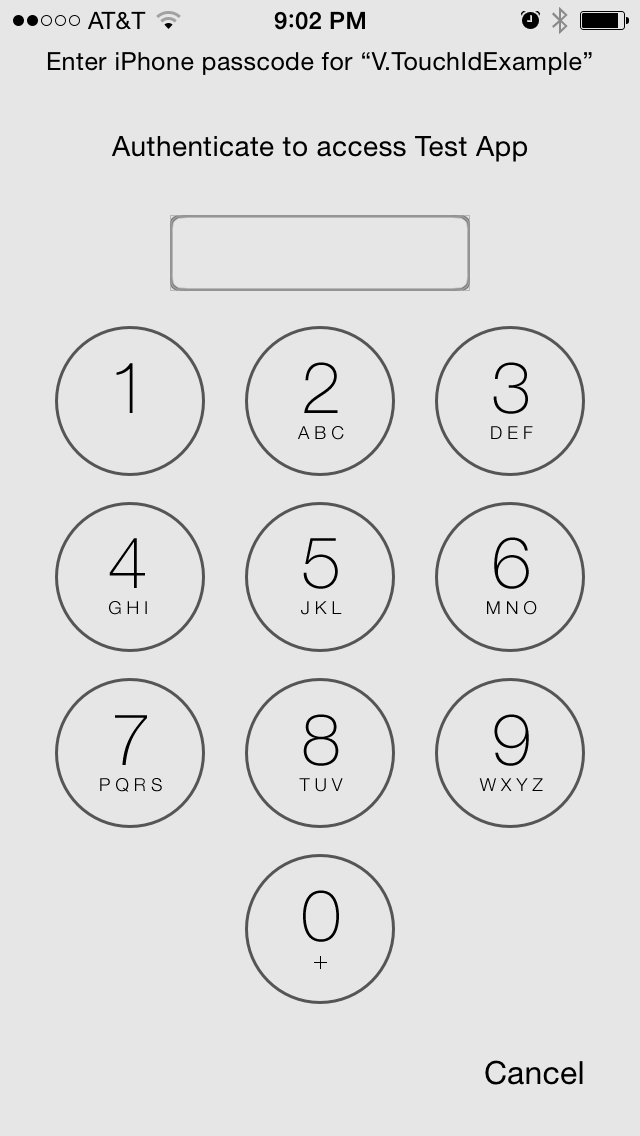
The demo also assumes you have Touch ID / Passcode enabled on your device. If you do not have Touch ID enabled but you do have a Passcode configured the application with skip to the Passcode entry screen.
Architecture
The sample application allows you to play with turning Touch ID / Passcode protection for an application on and off, and authenticating with each of the methods.
One can :
* Turn Touch ID on and off. Turning Touch ID off requires the user to authenticate one last time before allowing them to turn it off.
 * Once Touch ID is enabled the user can authenticate via Touch ID
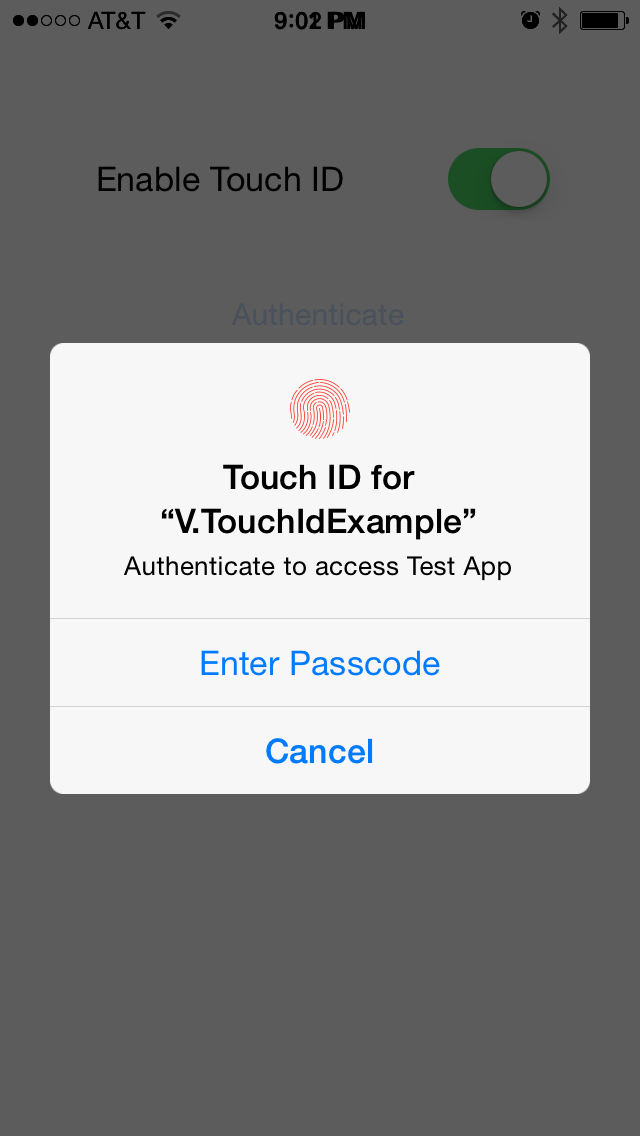 * If the user decides to not use Touch ID they can use their device’s Passcode to authenticate
 * If successful ‘Authenticated!’ is shown to the user.

Code
From the How to Use Apple‘s Touch ID Fingerprint API in Your Mobile App, we learn if we want to use Passcode as a fallback mechanism we need to interact with Apple’s Keychain. Basically, we are going to store some dummy information in Apple’s Keychain and then retrieve it via Touch ID / Passcode. It doesn’t matter what we store in the Keychain, we are not going to use it, but we are looking to trigger the workflow of presenting the user with the Touch ID / Passcode prompts, and be notified if our user was successful authenticating or not.
Turning on Touch ID
Let’s create our fake Keychain record.
//set our record
//note what you fill in here doesn't matter, just needs to be consistent across all uses of the record
var secRecord = new SecRecord(SecKind.GenericPassword)
{
	  Label = "Keychain Item",
      Description = "fake item for keychain access",
      Account = "Account",
      Service = "com.goallineapps.touchIdExample",
      Comment = "Your comment here",
      ValueData = NSData.FromString("my-secret-password"),
      Generic = NSData.FromString("foo")
};

secRecord.AccessControl = new SecAccessControl(SecAccessible.WhenPasscodeSetThisDeviceOnly, SecAccessControlCreateFlags.UserPresence);
SecKeyChain.Add(secRecord);

authenticateButton.Enabled = true;
The AccessControl flags of SecAccessible.WhenPasscodeSetThisDeviceOnly and SecAccessControlCreateFlags.UserPresence only allow us to store this record if the device has a passcode, and then retrieve it if the user is present.
Accessing our Keychain Record
Now that we have saved away our Keychain record, let’s try to access it.
partial void AuthenticateUser(UIButton sender)
{
	var rec = new SecRecord(SecKind.GenericPassword)
 	{
		Service = "com.goallineapps.touchIdExample",
		UseOperationPrompt = "Authenticate to access Test App"
	};
	SecStatusCode res;
	SecKeyChain.QueryAsRecord(rec, out res);
 	if (SecStatusCode.Success == res || SecStatusCode.ItemNotFound == res)
 	{
		//Success!!
		//add your code here to continue into your application
 		AuthenticatedLabel.Hidden = false;
 	}
 	else
 	{
		//Failure
 		AuthenticatedLabel.Hidden = true;
 	}
 }
Pressing our ‘Authenticate’ button will kick off an attempt to access our dummy Keychain item. Since we already told the system the item is protected with the flags SecAccessible.WhenPasscodeSetThisDeviceOnly and SecAccessControlCreateFlags.UserPresence this kicks off the Touch ID / Passcode workflow.
Turning Off Touch ID
For completeness, I force the user to authenticate one last time before allowing them to turn off Touch ID authentication. Once authenticated it will delete the record from the device.
//disable Touch ID
var record = new SecRecord(SecKind.GenericPassword)
{
	Service = "com.goallineapps.touchIdExample",
	UseOperationPrompt = "Authenticate to Remove Touch ID / Passcode from Test App"
};

SecStatusCode result;

//query one last time to ensure they can remove it
SecKeyChain.QueryAsRecord(record, out result);
if (SecStatusCode.Success == result || SecStatusCode.ItemNotFound == result)
{
	//remove the record
	SecKeyChain.Remove(record);
	authenticateButton.Enabled = false;
}
else
{
	//could not authenticate, leave switch on
	sender.On = true;
}
Summary
If you are looking to leverage the user’s existing Passcode to protect your application you can store a dummy value in the Keychain Service and then attempt to access it within your application to force an authentication attempt by the user via either Touch ID or Passcode.